How to connect Trust Wallet to Binance Smart Chain: explained
Binance Smart Chain is the most popular blockchain for DeFi applications after Ethereum. The largest decentralized protocols operate on the basis of BSC such as Uniswap, PancakeSwap, Aave, Curve Finance, SushiSwap, and others.
This guide will show you how to create and set up Trust Wallet, how to fund a crypto wallet, and how to connect it to the Binance Smart Chain network.
Getting Ready
Before you can start using Binance Smart Chain, you need to install and set up Trust Wallet , a mobile multi-currency wallet available on iOS and Android platforms that supports storage of ERC-20, BEP-20, and other blockchain tokens such as Polkadot (DOT), Cosmos (ATOM), Cardano (ADA), Tezos (XTZ) and many more, and a separate wallet can be used for each network.
Trust Wallet is also notable for the fact that it allows you to customize the list of assets and manage multiple wallets, as well as import other wallets from the seed phrase. For example, you can create a wallet separately for Ethereum and Binance Smart Chain.
To create and configure Trust Wallet, download the app from the developer’s official website.
Creating a wallet
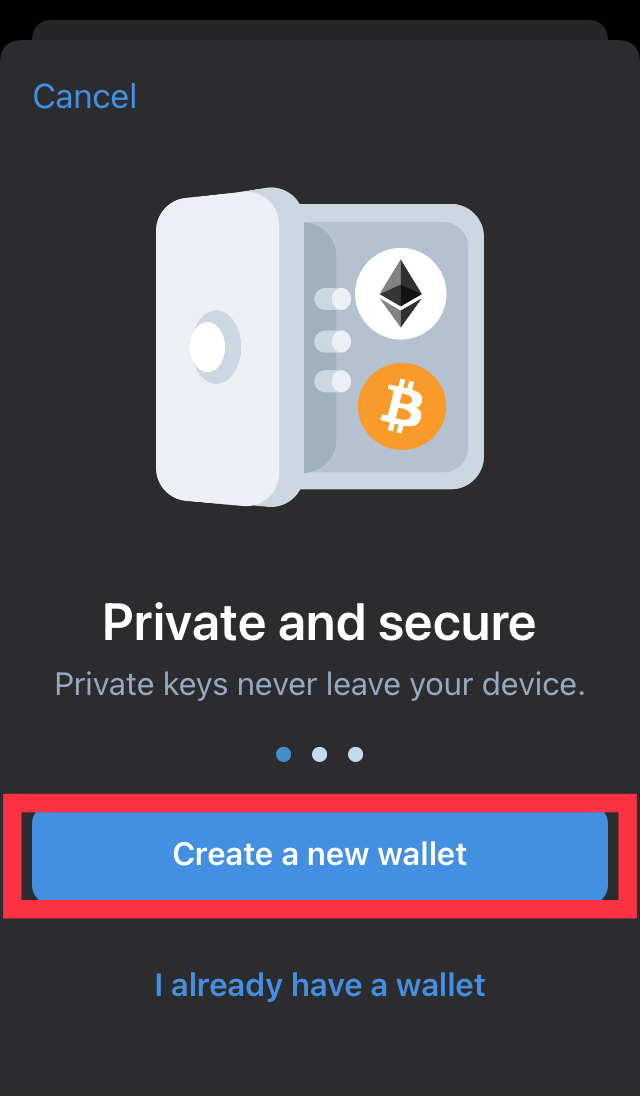
Step 1. Launch the application. On the start screen, Trust Wallet will ask you to choose what you want to do: create a new wallet or import an existing one. In our case, the first option works, so click Create a New Wallet.
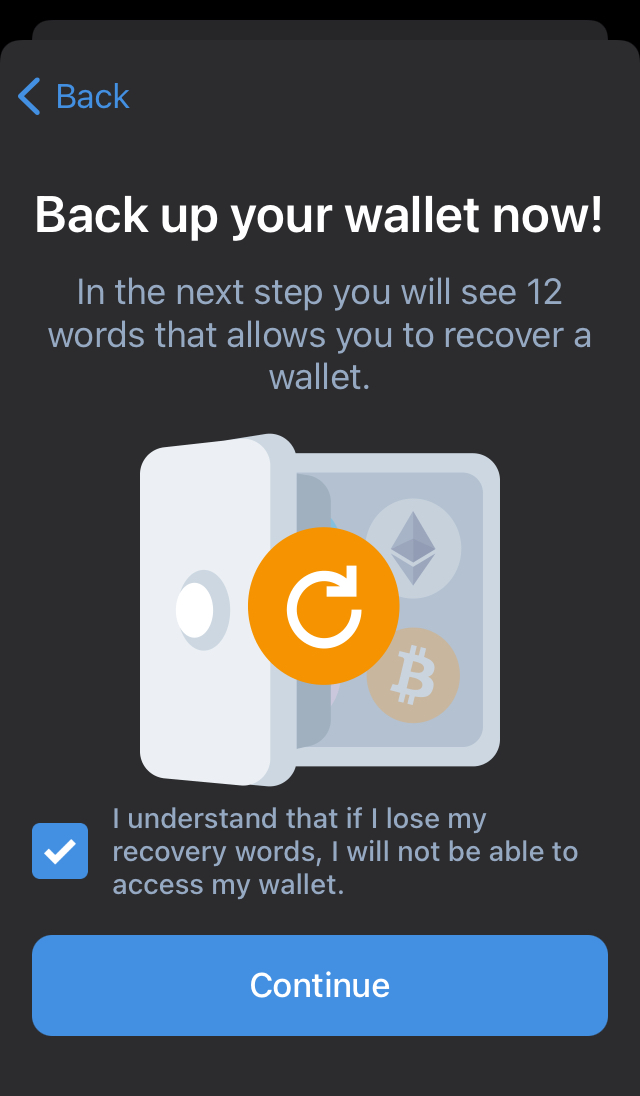
Step 2. Write down the backup phrase. You will need it to restore access to assets in case you lose your wallet or in case it gets stolen.
A seed phrase or mnemonic password is a sequence of pseudo-random words that a crypto wallet generates to restore access to assets. There are sequences of 12, 18, and 24 words. Trust Wallet generates a 12-word recovery phrase. Please note that if you lose both your seed phrase and access to the wallet, your funds will be lost without the possibility of recovery. Store the wallet seed phrase responsibly.
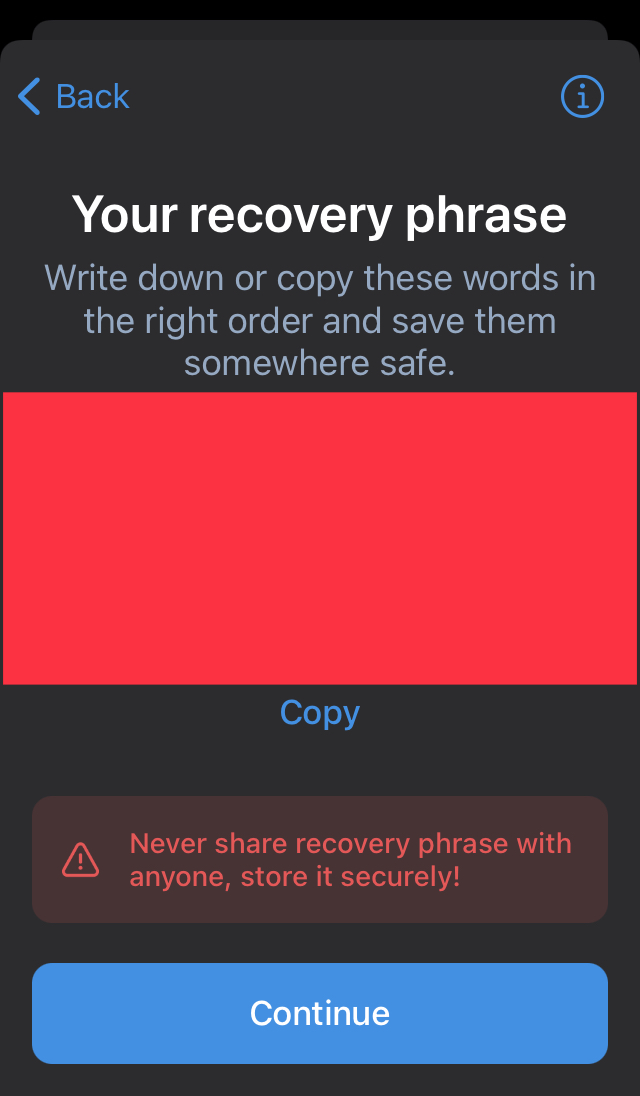
Check the box next to the informational message and click Continue.
The wallet will display a list of words that need to be written in the correct order. All words are written in lowercase in order. Take a pen and piece of paper, and then write down the recovery phrase shown on the screen. The mnemonic password can also be stored on other offline media or special devices such as Cryptosteel, Cver Steel, and Cryptotag.
Important: do not copy or take a screenshot of the screen while recording: that is unsafe. Also, do not store the mnemonic phrase on digital devices, as exploits and trojans can steal data from your device.
After you write down the seed phrase, confirm that you wrote it down correctly. Add words sequentially to the field on the Trust Wallet screen. When finished, click Continue.

You can make multiple backups and laminate them to keep them for as long as possible. Then hide the pieces of paper in a safe place – a safe, a safe deposit box, or some other device.
3. The wallet is ready to use.

You can now transact and connect to DeFi platforms. But before that, you need to configure the wallet. We recommend that you turn on password protection right away. Go to Settings> Security, enable the option App Lock, and set a password. Touch ID sign-in is automatically activated if your device has this feature enabled.
Adding funds to the Trust Wallet
Before connecting to decentralized protocols and working with them, you need BNB coins, which are needed to pay commissions for any transactions. Without them, you will not be able to transfer and exchange tokens. You can get an address for that in two ways, which we will discuss below.
Note: if you choose BNB, you will receive the address of the Binance Chain, which is different from the BSC blockchain. DeFi Apps do not support Binance Chain. If you send cryptocurrency to the wrong address, your coins may be lost. Read this article on how to recover cryptocurrency sent over to the wrong network.
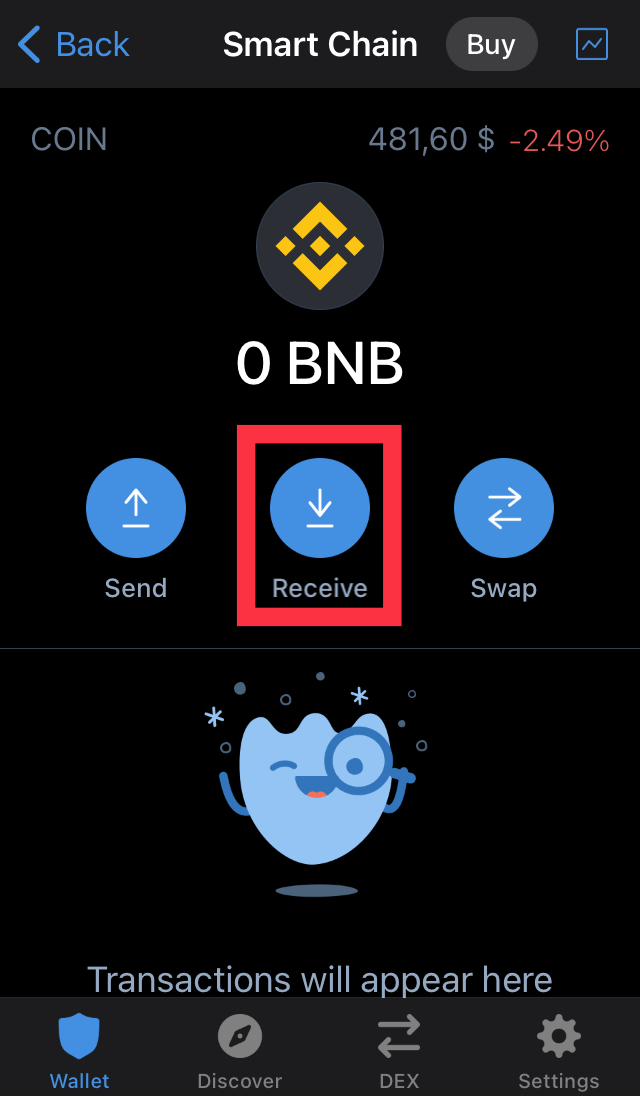
1 way. Select Smart Chain (not BNB) from the list on the main wallet screen, and click on it.

Then click Receive.
Method 2. Click on the Receive button on the main screen.
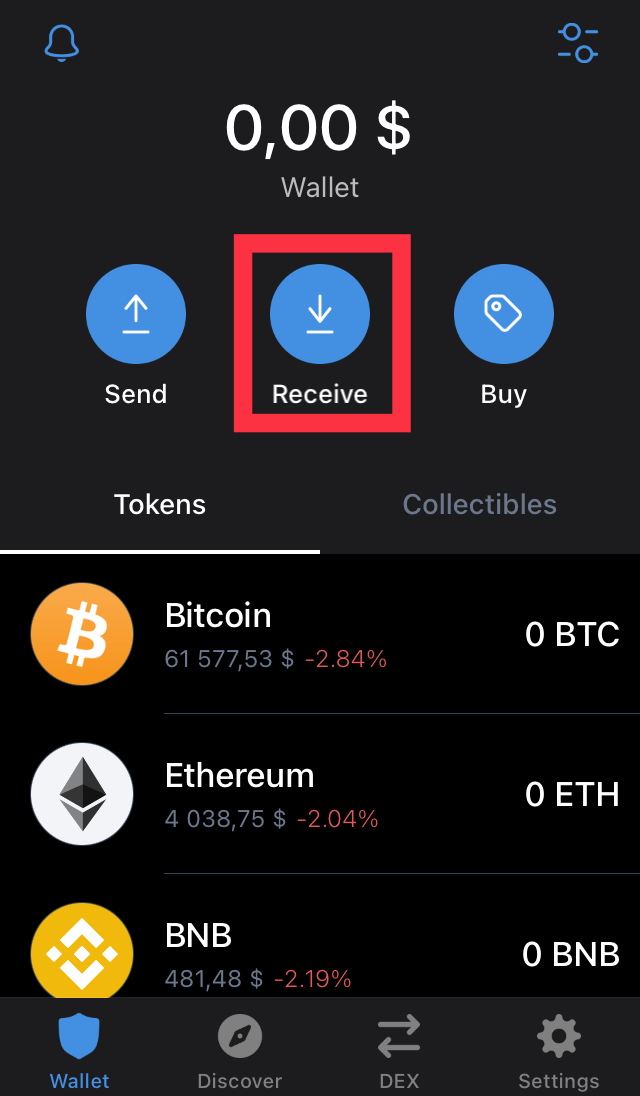
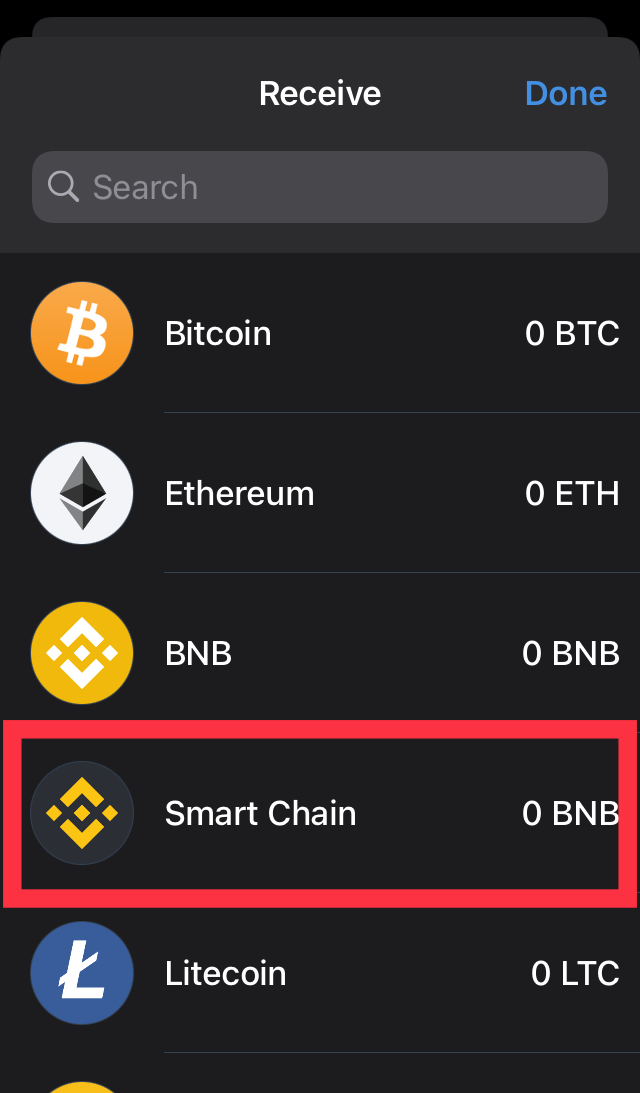
Then select Smart Chain (not BNB) and click on it.
As a result, the wallet address will be displayed, which can be copied, and a QR code for scanning and quickly sending cryptocurrency from another wallet.
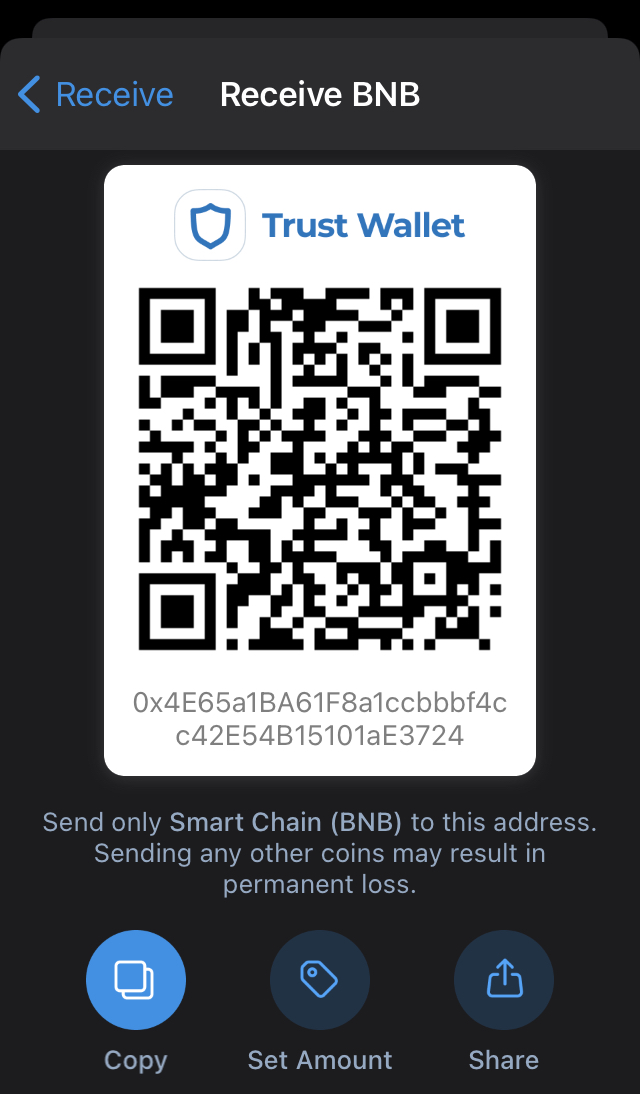
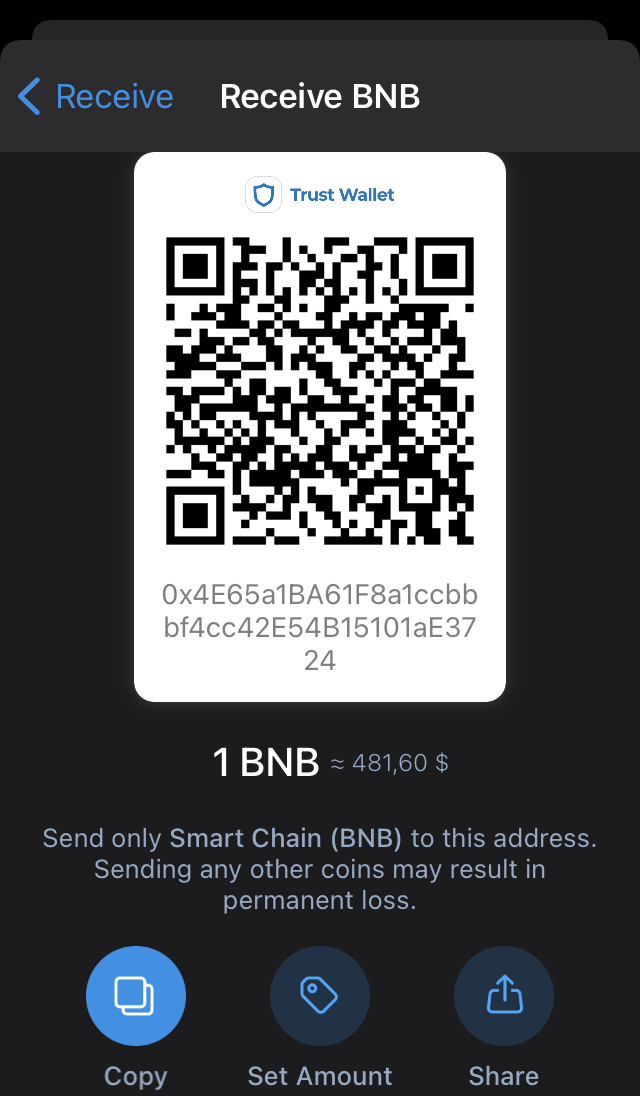
You can also send your wallet details via messenger or email by clicking Share or issue an invoice specifying the exact amount to be deposited using the function Set Amount.
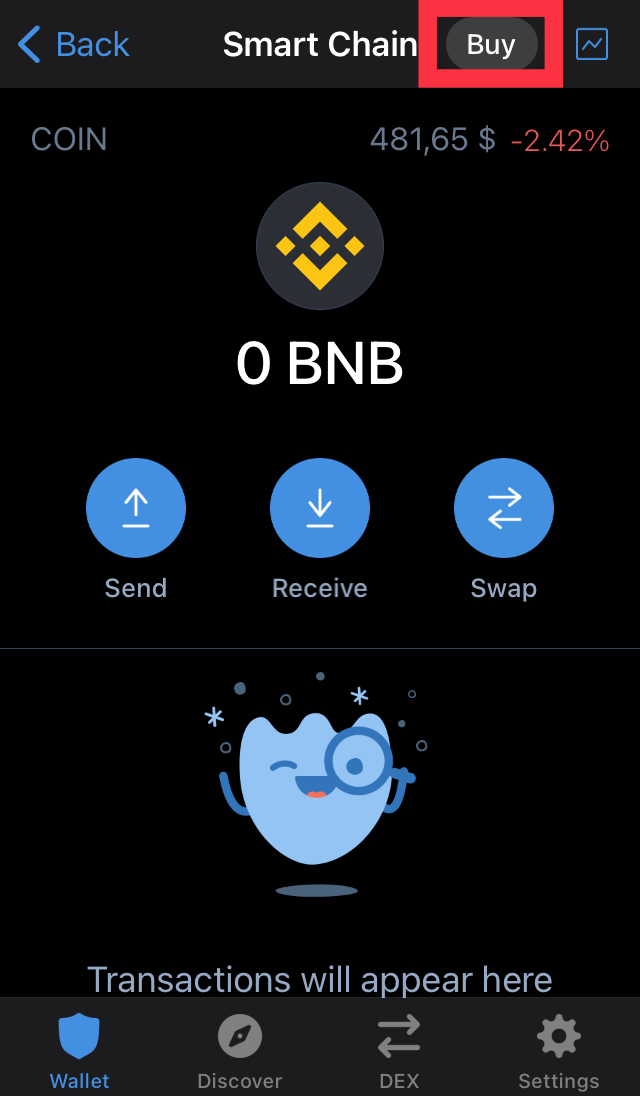
You can also fund your wallet by purchasing cryptocurrency. To do this, select Smart Chain and click on the Buy button in the upper right corner.
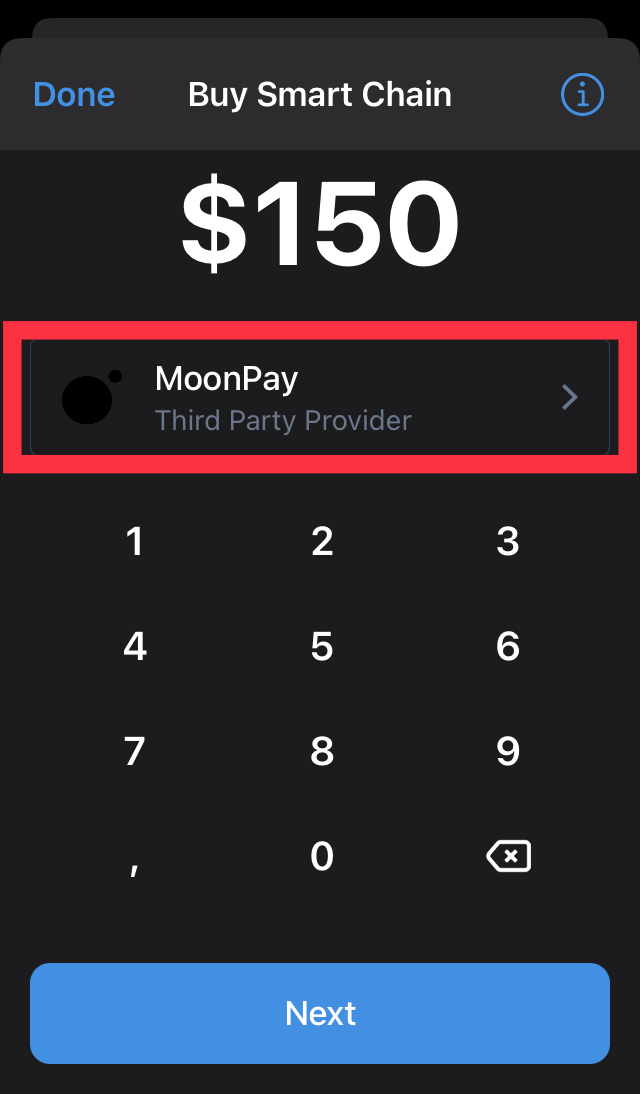
Choose a provider and complete the deal. Trust Wallet will automatically suggest the provider with the best rate. To buy cryptocurrency for fiat currency, you will need to go through a KYC procedure.
When you top up your crypto wallet, proceed to the next step – connect to the Binance Smart Chain.
Adding and Removing BEP-20 Tokens
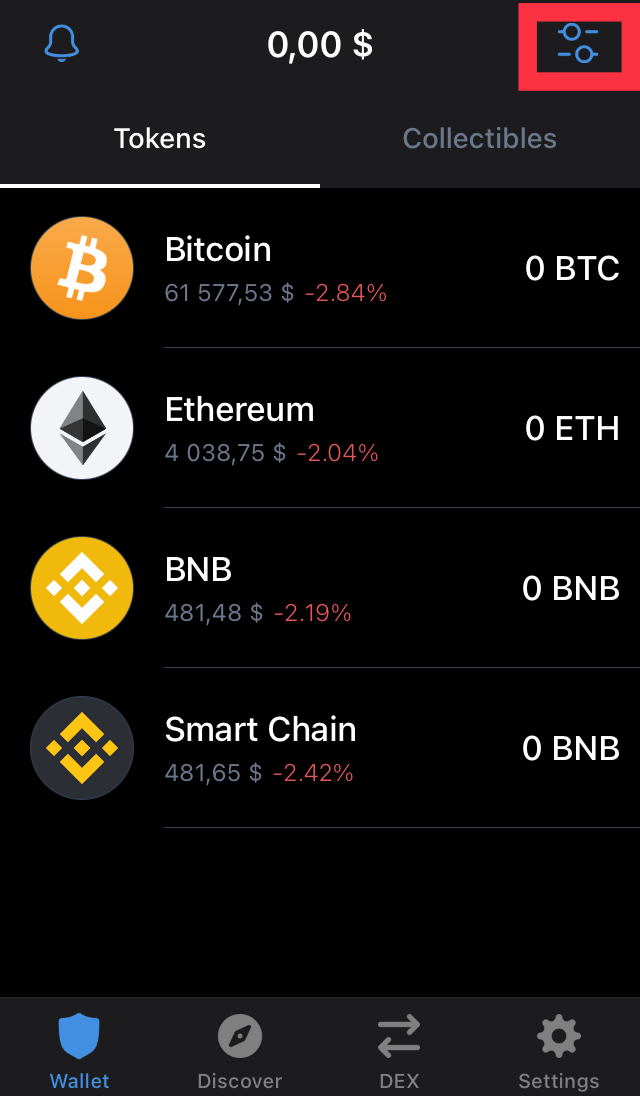
By default, only BTC, ETH, and BNB coins are displayed on the Trust Wallet home page. The rest of the tokens must be added manually. Let’s illustrate how to do this using the Binance USD (BUSD) stablecoin as an example.
Step 1. Click on the icon in the upper right corner as shown in the picture.
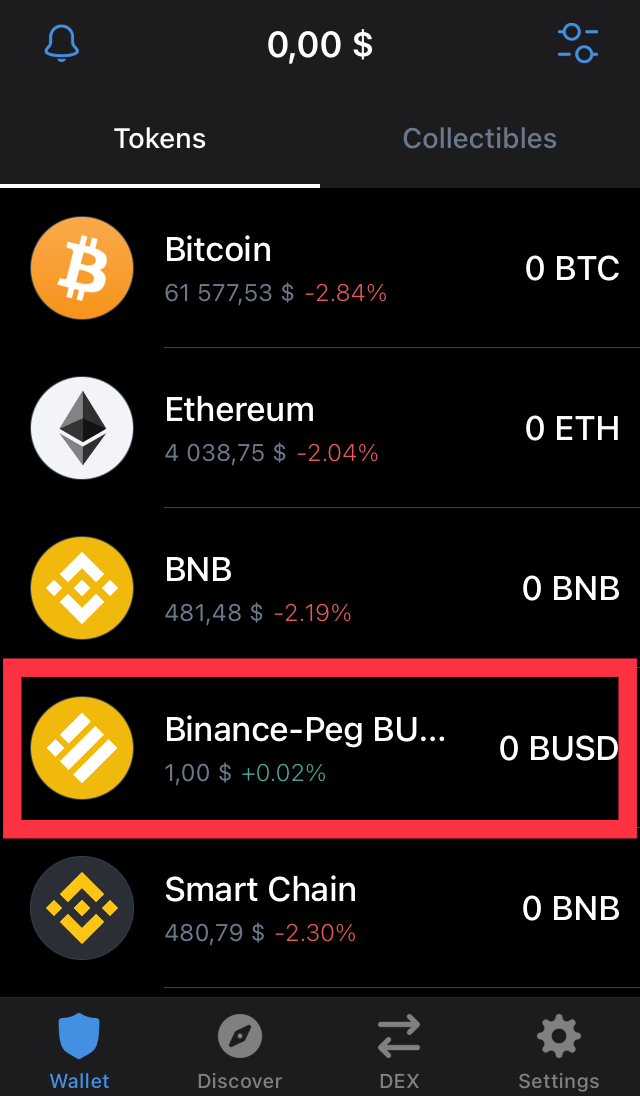
Step 2. Select the required token from the list or enter BUSD in the search bar to quickly find an asset, and then move the slider to the right. Similarly, you can delete coins and tokens from the list by moving the slider to the left. Please note that you need the BEP-20 token.

Ready! The wallet is now displayed on the home screen. To top up BUSD, a single address is used for BNB and all BEP-20 tokens.
Connecting to the Binance Smart Chain
So, your wallet is set up and ready to work with DeFi applications. For demonstrational purposes, we have selected the largest and most well-known platform on the BSC PancakeSwap blockchain. There are two ways to connect to the PancakeSwap exchange using Trust Wallet. Let’s consider the stages for each of them.
Connecting via a browser on a desktop device: PC or laptop
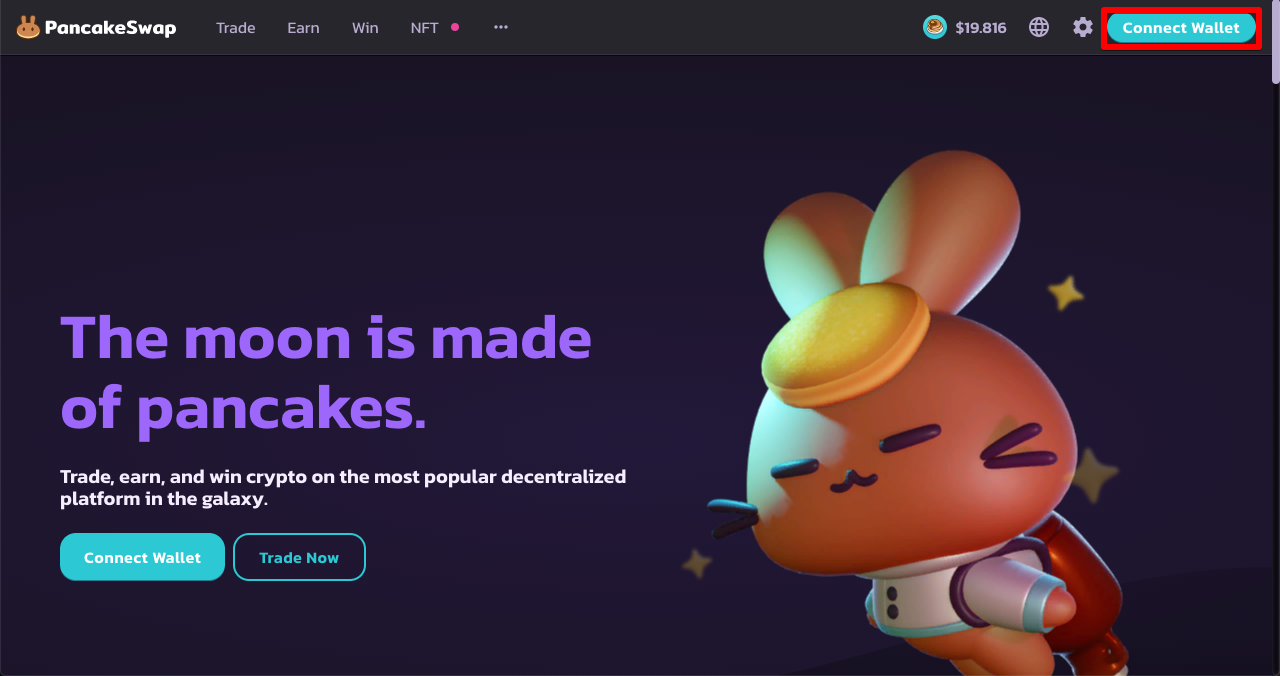
Step 1. Go to PancakeSwap Finance and click on the Connect Wallet button located in the upper right corner.
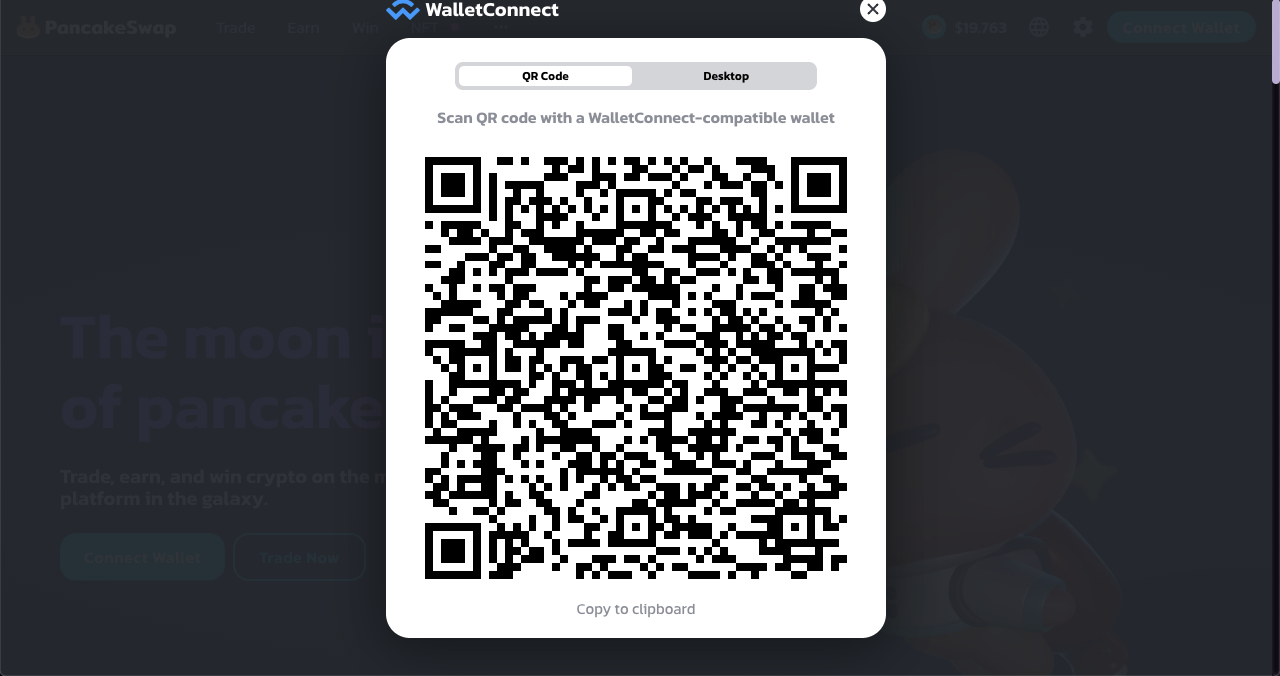
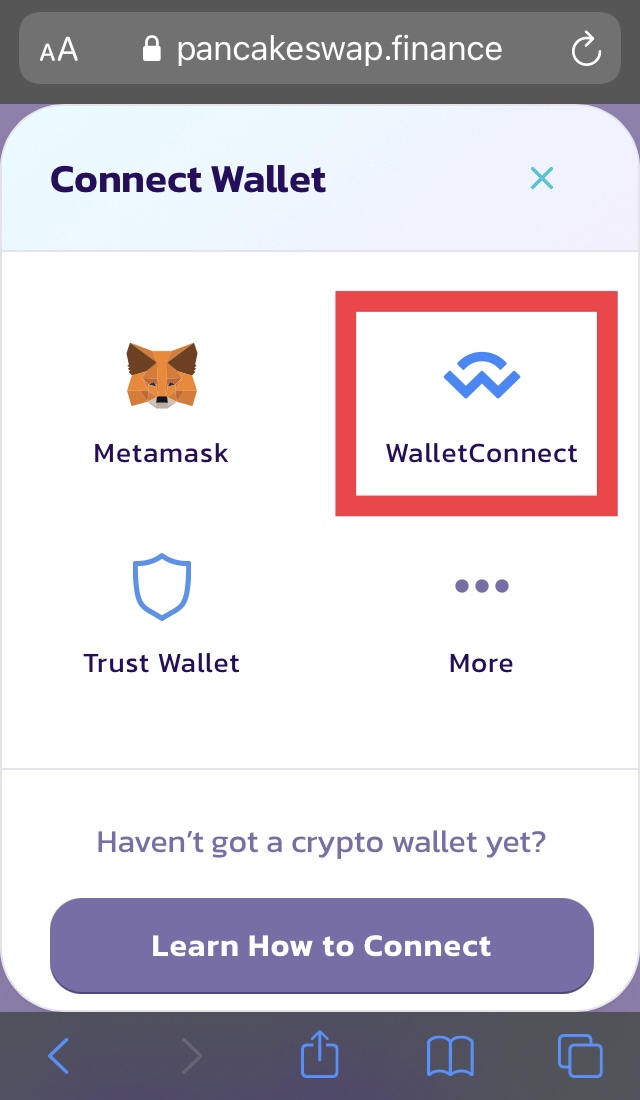
Step 2. Select WalletConnect. A mobile crypto wallet can only be connected to PancakeSwap via WalletConnect since Trust Wallet does not interact with the browser in any way.

Step 3. Scan the QR code. A QR code will be displayed that needs to be scanned in the TrustWallet app.
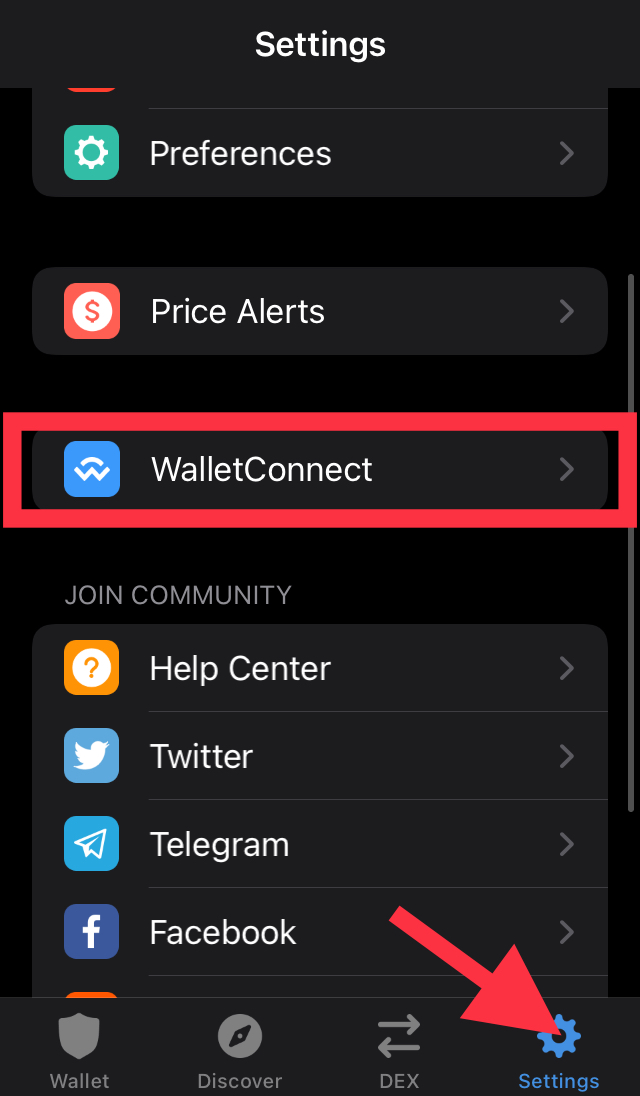
Launch the Trust Wallet app, go to the Settings section, and then click WalletConnect.
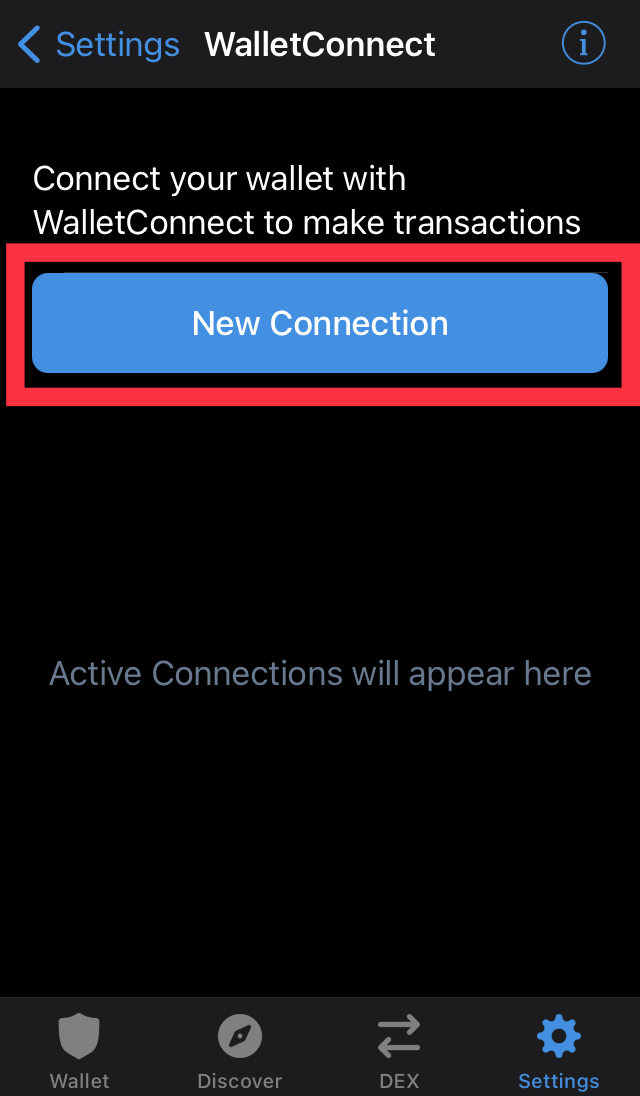
Now click on New Connection.
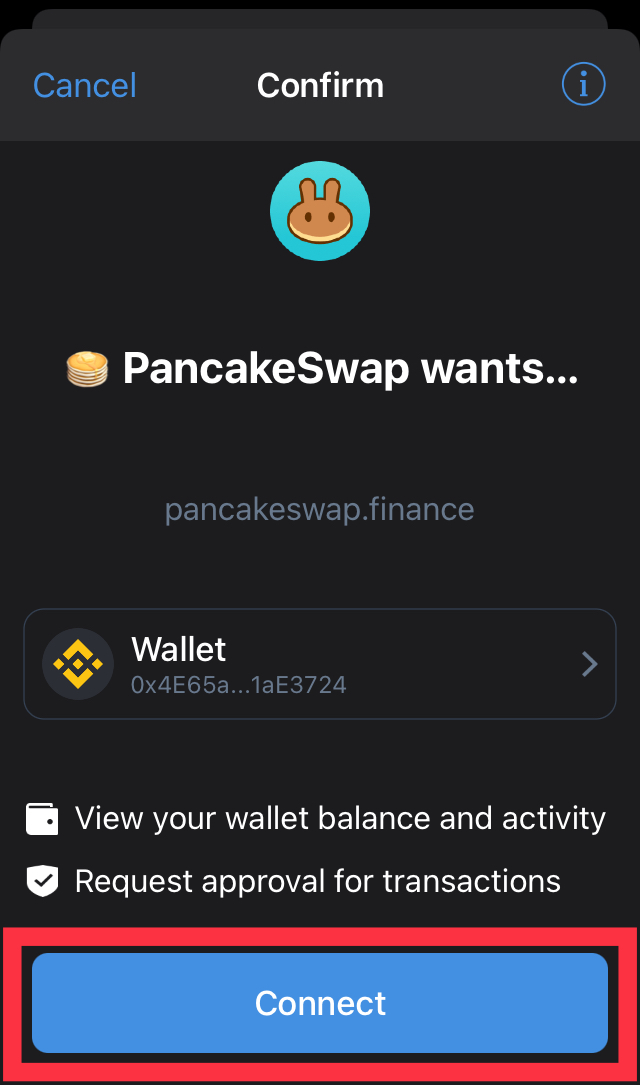
Point the camera at the QR code and scan it. Then click Connect.
Ready. Trust Wallet is connected to PancakeSwap.
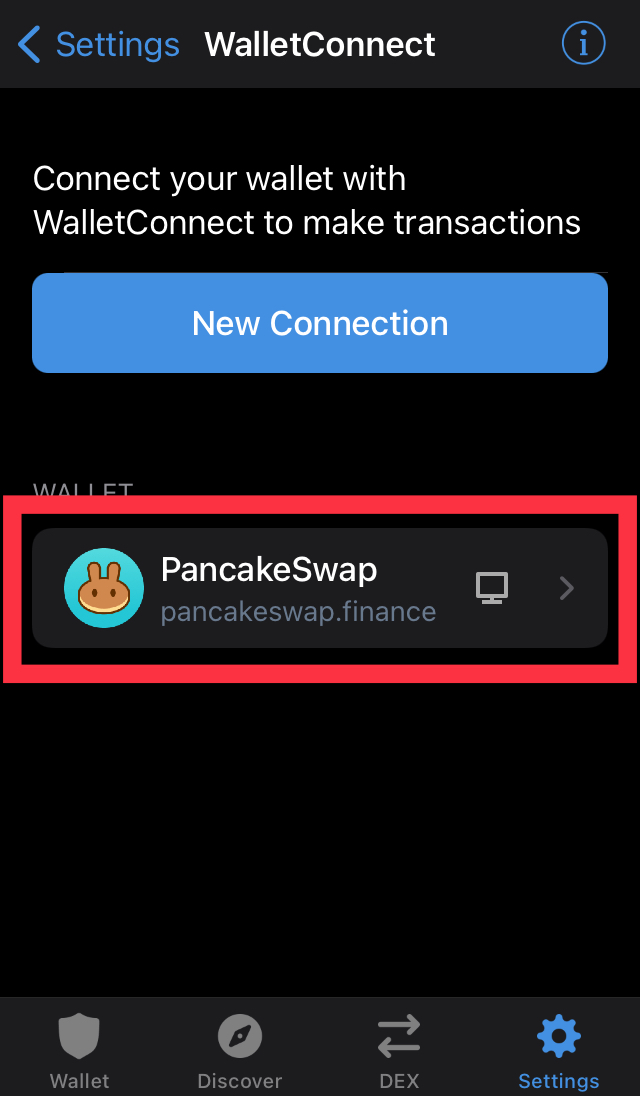
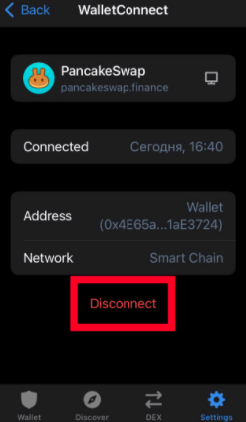
To disconnect a wallet, select a connection and then click Disconnect.
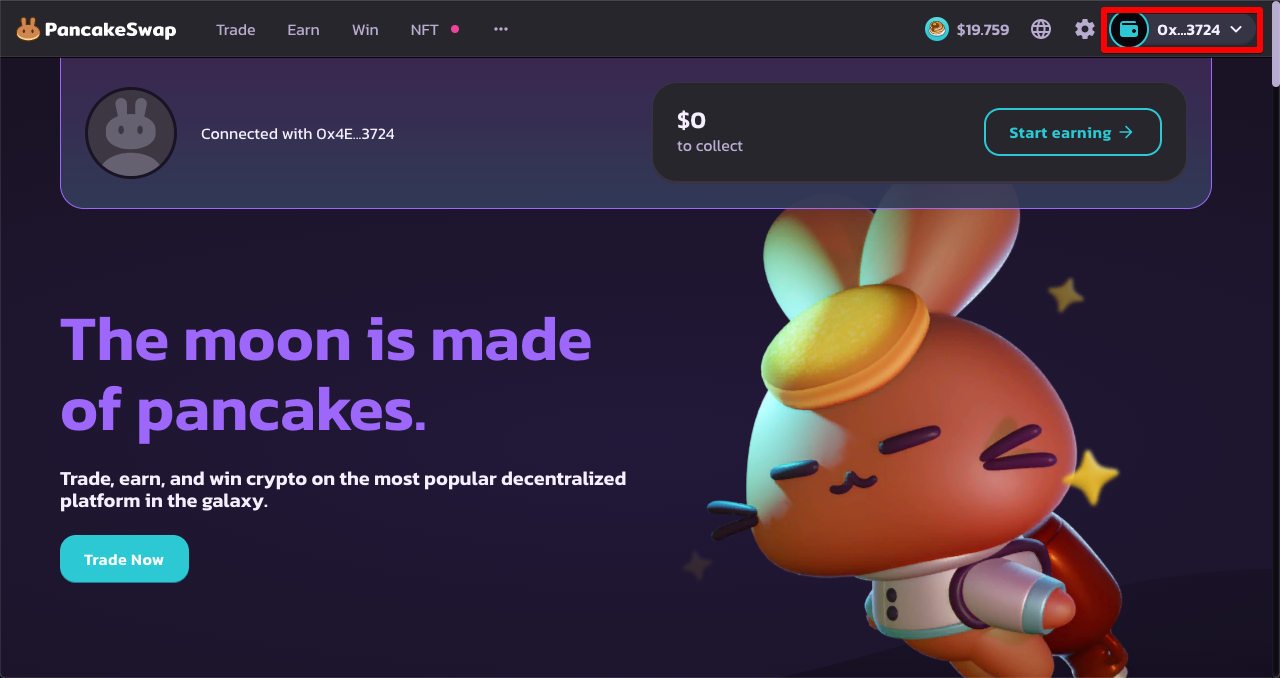
If the wallet is connected successfully, your BEP-20 address will appear in the upper right corner of the PancakeSwap interface.
Connecting on Mobile Devices
Earlier, Trust Wallet had a built-in DApp browser in which it was possible to connect to DeFi applications right in the wallet interface, but now it is not available. For an iOS or Android mobile browser, the steps are similar, but you don’t need to scan a QR code.
Step 1. Open PancakeSwap Finance, click Connect Wallet, and select WalletConnect.
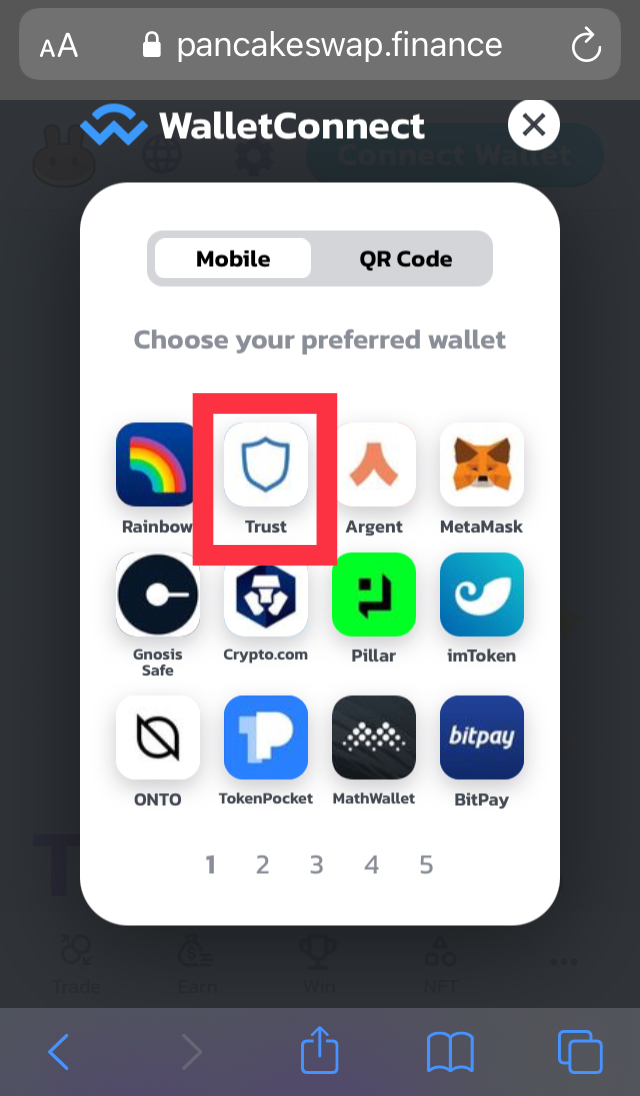
Step 2. Find Trust Wallet and click on it.
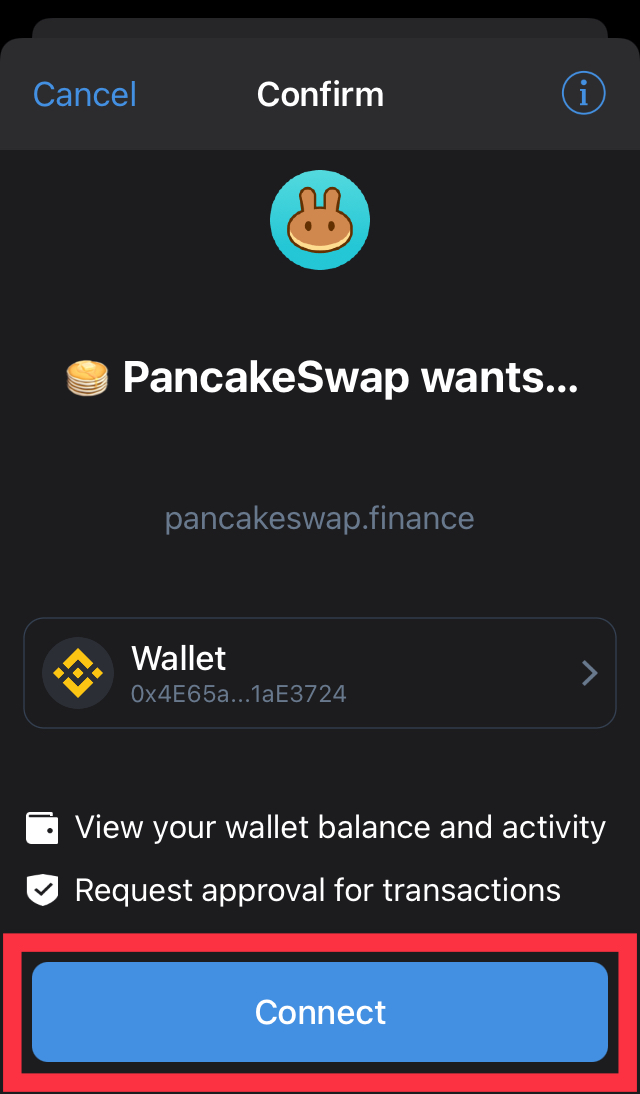
Step 3. Click Connect.
Conclusion
Now you know how to create a new crypto wallet using Trust Wallet and connect it to DApp-application PancakeSwap.This guide is suitable for other DeFi platforms as well since the steps for connecting a crypto wallet will be approximately the same everywhere.